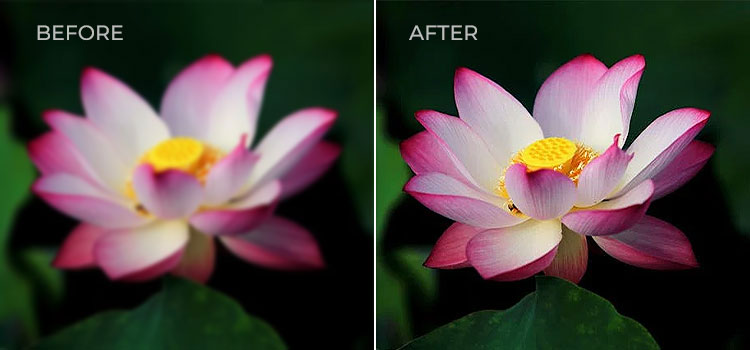
Blurry photos – everyone has them. Whether it’s a treasured family snapshot from decades ago or a recent action shot, unwanted blur can detract from the story a photo tells. The good news is that restoring clarity to blurry images is more achievable than ever. Advances in technology, from sophisticated software to AI, mean that what was once impossible in a darkroom can often be done on a computer. At the same time, true photo restoration remains as much an art as it is science, requiring a careful touch and realistic expectations.
In this comprehensive guide, we’ll explore why photos become blurry, the different types of blur, and most importantly, how to unblur a photographic image using both traditional techniques and modern AI-powered tools. We’ll also take a brief historical detour to see how experts approached the problem before the digital era. Along the way, we’ll discuss real-world examples, tips for getting the best results, and how to know the limits of restoration. Whether you’re a professional photo restorer or someone trying to save a beloved photo, this guide will help you approach the challenge with knowledge and confidence.
Why Do Photos Get Blurry?
Understanding the root cause of blur is essential to fixing it properly. There are many reasons images lose sharpness. Here are some of the most common:
- Camera Shake: Even a slight movement of the camera during the exposure can cause the entire image to streak or smear. Handheld shots at slow shutter speeds often suffer from motion blur due to camera shake, resulting in telltale directional streaks (for example, a slight jerking motion can blur everything in the direction of the movement). This is very common in low-light photos without flash.
- Subject Movement: If the subject moves while the shutter is open, a static background may stay sharp but the moving subject appears as a blur or ghostly streak. Think of an old photo where a person’s waving hand looks transparent – that’s subject motion blur. Fast-moving subjects (kids, pets, sports) or long exposures can easily create this effect.
- Focus Issues: Sometimes the camera’s focus misses the mark. The autofocus might lock onto the wrong object or distance, or fail entirely, leaving the main subject out of focus. In other cases, shallow depth of field means only a small plane is in focus – if the subject isn’t within that plane, they’ll appear blurry. Focus-related blur tends to make the whole subject soft without any clear direction to the blur.
- Low Resolution or Compression: An image might appear blurry not from motion, but simply from lack of detail. Older digital cameras or camera phones with low megapixels, as well as images heavily compressed (like a low-quality JPEG), can look mushy or lacking sharp edges. Enlarging a low-resolution image also makes it look blurry or pixelated because there isn’t enough detail to begin with.
- Lens Quality and Optics: Not all lenses produce pin-sharp images. Older or lower-quality lenses may introduce blur, especially toward the edges of the frame or at wide aperture settings. Optical aberrations like field curvature or astigmatism can make parts of an image (often the corners) less sharp. Even a good lens will produce some blur outside the depth of field – for example, background bokeh blur is often desirable, but unintended lens softness is not.
- Improper Scanning or Printing: In the case of old photographs and film, the way they are digitized or reproduced can introduce blur. For instance, taking a photo of a print with a phone, or using a poor scanner, might result in a blurry digital image even if the original print is sharp[1]. The same goes for making prints – a misaligned enlarger or printer issue could soften the image. It’s always best to scan old photos properly; many “blurry” digital copies of old pictures are simply the result of bad scanning technique.
Knowing the source of the blur is half the battle – it guides you in choosing the right restoration approach. Motion blur from a shaky camera might be tackled differently than blur from missed focus or low resolution.
Types of Blur
Not all blur is created equal. Identifying the type of blur you’re dealing with can drastically improve your chances of a successful fix, since different techniques target different problems. The three most common types of blur are:
- Motion Blur: This occurs when the camera or subject moves during the exposure. Motion blur has a directional character – look for streaks or smeared edges in a particular direction. For example, a moving car might appear as a horizontal streak, or a person nodding their head could have a vertical “ghost” double image. Motion blur can range from mild (a subtle softness) to severe (unrecognizable shapes). Because it has direction, specialized techniques (like motion deblurring algorithms or directional sharpening) are often needed to address it.
- Out-of-Focus Blur (Gaussian Blur): If the lens is misfocused or the depth of field is too shallow, the result is an evenly soft image with no sharp point of focus. This type of blur is often called “Gaussian” blur because out-of-focus blur resembles the Gaussian blur filter effect – a uniform softness without directional streaks. The entire subject might look slightly hazy or “milky.” Edges are rounded and lack definition. Misfocus blur is challenging because the detail wasn’t captured in the first place; you’re essentially trying to reconstruct something that the camera failed to lock onto.
- Lens or Optical Blur: This category includes blur introduced by the limitations of the optics or sensor. It might show up as softness at the edges of the frame, slight blurring from lens aberrations, or even motion-like distortion in cheap lenses. For instance, a vintage camera lens might render the center sharp but the edges blurry due to field curvature. Additionally, lens blur can refer to the blur from depth of field (areas not in the focal plane), which often produces a pleasant bokeh in the background but is unwanted if it affects the main subject. Unlike motion blur, lens/optical blur isn’t a consistent streak – it’s more about certain zones of the image lacking clarity or overall softness due to technical limits.
Recognizing which type of blur you have is crucial. A motion-blurred photo might benefit from a tool that detects motion path, whereas an out-of-focus portrait might need an AI enhancement that “invents” plausible detail. There is no one-size-fits-all solution because each type of blur needs a different strategy or combination of techniques.
Before Digital: Darkroom Techniques and Hand Retouching
Modern tools may make deblurring seem like magic, but photo restoration long predates Photoshop. How did photographers and retouchers improve blurry photos in the days of film and darkrooms? The answer: with a lot of skill, patience, and clever analog tricks.
In the early days of photography, once a photo was taken and developed, there was very little that could be done to fix a fundamentally blurry shot. Photographers often simply had to accept a blurry image or try to re-shoot the scene. However, in certain cases, they developed techniques to enhance the appearance of sharpness in prints:
- Darkroom “Unsharp Masking”: It might surprise some to learn that the popular Unsharp Mask filter in digital editing has its roots in film photography. In fact, unsharp masking was first implemented in darkroom photography[2]. The process involved creating a blurred (or “unsharp”) positive of the original negative and sandwiching it with the negative. When projected onto photo paper, this combination increased the apparent acutance (perceived sharpness) of the final print[2]. Essentially, the blurred mask would cancel out low-frequency detail and boost edge contrast, making the image look clearer (though not actually adding new detail). This was a very advanced darkroom technique, requiring careful alignment and exposure, but it could make a slightly soft image look crisper. The resulting print was clearer – albeit at the cost of being a less accurate representation of the original scene, an important point to remember with any sharpening method[2].
- Dodging and Burning: While dodging (lightening) and burning (darkening) parts of a photo in the enlarger can’t remove blur, these techniques were used to increase local contrast and draw the eye to certain details. A skilled printer might burn in some areas to accentuate shadows or dodge to brighten highlights on a subject’s face. By increasing contrast on edges, the image can appear a bit sharper. This is essentially a manual way of enhancing detail – similar in concept to what clarity or contrast sliders do in digital tools. It’s not fixing the blur per se, but it can improve the perceived sharpness or at least make the photo more readable.
- Manual Retouching of Negatives and Prints: In the hands of a retouching artist, a blur could sometimes be mitigated by hand. Professionals would work on large-format negatives on illuminated retouching desks, using magnifying lenses, special knives, pencils, brushes, and dyes[3]. They could gently etch or scrape the emulsion with a blade to lighten small areas (adding a highlight or greater contrast on an edge), or use a graphite pencil to build up density on the negative (making an area of the print darker and thus seemingly more defined)[3]. For example, an artist retouching a portrait negative might carefully pencil in the catchlight in a person’s eyes or sharpen the outline of the irises, so when printed the eyes appear more in focus. They might also add subtle lines where an edge of clothing should be crisper. This was extremely delicate work – too heavy a hand could ruin the negative. As the Swiss Camera Museum describes, retouchers kept their touch to the strict minimum necessary, using knives first and then pencils or brushes to delicately apply changes[4]. The goal was to improve the photo while making the alterations invisible.
- Optical Tricks: Photographers sometimes used optical tricks during or after shooting to compensate for limitations. For instance, in enlargement, they could use a slightly higher-contrast paper to make edges “pop” more. There were also attachment filters for enlargers that mimicked an unsharp mask effect. In the taking stage, some even experimented with gyro-stabilized lenses or mirror lock-up to reduce blur. But in terms of restoration, options were largely limited to the darkroom and hand methods described above.
It’s important to note that historical techniques had limits. If a photo was extremely blurry, no amount of darkroom magic could truly restore lost detail – much like today. Professionals did what they could: make the image clearer enough to be usable or more pleasing, and sometimes completely redraw small details on portraits. It was tedious work and very much a specialized skill. Photo retouching evolved alongside photography itself; evidence of practitioners manually fixing images exists from the 19th century[5]. By the mid-20th century, high-end studios employed retouchers who could perform minor miracles with a scalpel and airbrush, but those miracles were often subtle improvements rather than full rescues of a hopelessly blurred shot.
The takeaway: Before digital tools, improving a blurry photo meant working manually, often frame by frame and pixel by pixel (except the “pixels” were film grain). This historical perspective underscores how revolutionary modern technology is – but also reminds us that restoration has always required finesse. The care that 19th-century retouchers used with their pencils is the same care we must use with our digital brushes and filters today.
Modern Approaches to Unblurring Photos
Today, in the digital era, photo restoration experts have an unprecedented array of tools to tackle blurry images. Broadly speaking, modern methods fall into two categories: manual digital editing and AI-powered automatic tools. Each approach has its strengths and is often used in combination with the other.
- Manual Digital Restoration – This refers to using image editing software (like Adobe Photoshop, GIMP, or other editing programs) to carefully sharpen or fix an image by hand. It requires skill, knowledge of the software, and a good eye. The advantage is granular control: a skilled editor can choose exactly which parts of the photo to sharpen, how much, and can employ creative techniques to reconstruct details. Manual work is often time-consuming, and the quality of results depends heavily on the editor’s expertise. A professional working painstakingly in Photoshop might extract more believable detail from a blurry photo than an automated filter could, but it might take hours of effort.
- AI-Powered Tools – In recent years, artificial intelligence and machine learning have revolutionized photo restoration. AI-driven software can analyze a blurry image and predict what a clearer version might look like, often in a matter of seconds. These tools (which range from desktop applications to mobile apps and online services) are typically user-friendly – sometimes just a single click yields a sharper image. The upside is speed and often surprisingly good results even for users with no editing experience. The downside is that AI is making educated guesses; it might introduce artifacts or “imagined” details that weren’t actually in the original. You get less manual control over the process, and sometimes the output can look unnatural if pushed too far. Still, for many use-cases (and for non-experts) AI tools can produce a dramatically improved photo with minimal effort.
In practice, professionals often use both approaches: for example, running an image through an AI deblurring program as a starting point, then fine-tuning the results manually in Photoshop to correct any odd artifacts and ensure the result looks natural. Let’s dive deeper into each approach.
Manual Techniques in Photoshop (Digital Darkroom)
Adobe Photoshop is the industry standard for photo restoration and an essential tool in the fight against blur. However, it’s not a magic wand – it cannot conjure perfect sharpness out of nothing. What it offers is a suite of powerful tools and filters that, when used judiciously, can significantly improve a blurry image. Mastering these techniques requires training, practice, and an understanding of an image’s limits. That’s why detailed restoration work is often best left to professional photo editors or restoration specialists, who know how to get the most out of Photoshop without making the image look over-processed.
Some of the key Photoshop techniques and tools for deblurring include:
- Sharpening Filters: Photoshop provides several filters to enhance sharpness. The classic “Unsharp Mask” filter, despite its confusing name, is a go-to for many pros. It increases contrast around edges to give the illusion of a sharper image – essentially the digital implementation of the old darkroom unsharp masking trick[2]. There’s also “Smart Sharpen,” which offers more advanced control, and a specialized “Shake Reduction” filter. The Shake Reduction was introduced to analyze the image and automatically reduce blurring from camera motion. It can detect the probable path of movement (linear, arc, etc.) and apply a deblurring algorithm to counteract it[6]. In practice, Shake Reduction can sometimes work wonders on mild camera shake – for example, turning a slightly jittered photo of text into something readable. However, it has limitations and doesn’t always handle complex blurs perfectly. (As of 2022-2023, Adobe began phasing out the old Shake Reduction filter in favor of newer AI enhancements[7], but many photographers recall it as an ambitious tool that sometimes saved a shot.)
- High-Pass and Layer Blending: Many retouchers prefer a manual approach to sharpening using layers. A common technique is to duplicate the image layer, apply a High Pass filter (which isolates edges), and then set that layer’s blending mode to something like Overlay or Soft Light. This method crisply defines edges without overly amplifying noise in flat areas. It’s essentially doing what Unsharp Mask does, but gives the user more control via the blending mode and opacity. You can mask or erase parts of this sharpened layer to only apply sharpening where needed (for example, only on a person’s eyes and not on the out-of-focus background).
- Selective Sharpening and Detail Enhancement: A huge benefit of manual editing is the ability to sharpen selectively. Not every part of a photo should be sharpened equally – for instance, in a portrait you might want the eyes and facial features sharp, but leave the background or a person’s shoulders slightly soft to maintain depth. In Photoshop, one might use the Sharpen Tool brush on specific areas or use layer masks to constrain sharpening filters to certain regions. Another technique is painting on a low-opacity layer to literally reconstruct or emphasize details (for example, painting subtle strokes where an eyebrow hair should be to give definition). These steps require a steady hand and a sense of artistry, similar to the old hand-retouching. Indeed, modern restoration experts sometimes find themselves digitally “painting in” details much like an analog retoucher would pencil them – just with a graphics tablet and pixels as the medium.
- Noise Reduction and Cleanup: Often, bringing out detail with sharpening also brings out grain or digital noise. A blurry photo, once sharpened, might exhibit speckles or a gritty texture, especially if it was taken in low light. Professionals will often pair sharpening with noise reduction (either within Photoshop or using plugins) to strike a balance between clarity and cleanliness. They may also manually clean up artifacts introduced by sharpening – for example, if sharpening created a halo around a dark object against a light background, an editor can carefully fade or erase that halo. Layer blending modes likeLuminosity are used as well, so that sharpening affects only the brightness of pixels (and not color, which can introduce weird chromatic artifacts).
- Advanced Plugins and Scripts: Beyond Photoshop’s built-in tools, there are third-party plugins (such as Topaz InFocus or older tools like Focus Magic) that specialize in deblurring via deconvolution algorithms. A skilled editor might try these on a tough image. There are also AI-powered plugins nowadays that integrate with Photoshop. However, using them still counts as “manual” work in the sense that the operator decides how to blend their effect and whether to use them at full strength or only partially.
What truly distinguishes manual restoration is control. An expert can choose to leave certain very blurry areas alone (to avoid nasty artifacts) while enhancing more recoverable parts of the image. They can also make judgment calls – for instance, if a face is so blurry that no real detail can be recovered, a professional might opt to keep it slightly soft rather than “sharpen” it into an uncanny, AI-generated face that doesn’t look like the person. This kind of decision-making is where human expertise shines.
Finally, it’s worth noting that Photoshop and similar tools have a learning curve. The software is complex and the techniques can be intricate. That’s why photo restoration services exist and why professionals invest so much time honing their craft. When done right, manual digital techniques can produce a superior result that preserves the authenticity of the photo – the image will look sharper but still real. When done poorly, it can result in an over-sharpened, “crispy” look or weird artifacts that give away the edit. Thus, while anyone can try these tools (and experimentation is part of the fun!), achieving a natural-looking unblur often requires a careful, methodical approach that comes with experience.
Using AI-Based Tools for Deblurring
In the last few years, AI-based image restoration tools have exploded in popularity. These range from dedicated desktop applications to mobile apps and even web-based services. They use deep learning models trained on millions of images to predict what a sharper version of your blurry photo should look like, often with impressive results. The appeal is obvious: fast, one-click fixes that can turn a fuzzy image into something clear enough to use.
AI tools have become part of the photo restorer’s toolbox. A balanced view, however, recognizes that AI is augmenting human skills, not completely replacing them. The best results often come from a hybrid approach: let the AI do the heavy lifting to get a sharper starting point, then have an expert refine the image, correcting any weird bits and ensuring the final photo still looks natural. AI is also continually improving. With each year, algorithms get better at distinguishing real detail from noise and hallucinating less.
Tips for Better Results
Unblurring a photo, whether via manual editing or AI, requires a combination of technical steps and aesthetic judgment. Here are some best-practice tips to help you achieve better, more natural-looking results when restoring a blurry image:
- Always Work Non-Destructively: This is the golden rule of restoration. Keep your original image layer intact and do your edits on duplicates or adjustment layers. In Photoshop, for example, you might convert the image to a Smart Object before applying filters like sharpening – this way the filter is non-destructive and adjustable. Or simply duplicate the layer and work on the copy. By preserving an untouched original, you can always mask back parts of it or start over if needed. Non-destructive workflow also means you can try different approaches without permanently altering the only copy of the image. If using AI tools, work on a copy of the file so the original scan/photo remains unchanged. This allows you to compare before-and-after and ensure you’re truly improving the photo.
- Zoom Out Often: When sharpening or deblurring, it’s easy to get carried away while zoomed in at 200% examining individual pixels. But what matters is how the image looks at normal viewing size. An effect that seems subtle while zoomed in can appear overdone when zoomed out. Frequently zoom out to 100% or fit-to-screen view to check the overall look. Over-sharpening artifacts (like halos or gritty texture) are usually very obvious at normal size[16]. The goal is to improve clarity without making the image scream “I’ve been sharpened.” A related trick is to step away from your screen briefly or view the image on a different device; a fresh glance will often reveal if you pushed it too far.
- Avoid Global Sharpening of the Entire Image: Not every inch of a photo needs equal sharpening. In fact, sharpening everything can make the important parts harder to see. Focus on the key subjects and details – for example, the eyes in a portrait, the license plate or face in a car photo, the center of a group shot, etc. If you sharpen uniformly, backgrounds or noise will become distracting. Instead, consider using masks or selection tools to isolate the areas that benefit most from sharpening. Many AI tools now have “face enhance” or “subject only” options for this reason, to restrict improvements to where they matter. By being selective, you also preserve some of the natural look of the photo. Over-sharpened backgrounds or bokeh can look especially unnatural, so it’s often best to leave out-of-focus backgrounds blurry (that’s how depth-of-field is supposed to work).
- Mind the Noise: Sharpening and deblurring often amplify noise or grain that’s present in the image. A blurry low-light photo, once sharpened, might look sharp but also very noisy. It’s a balance. Use noise reduction in tandem with sharpening. Some software (like Topaz) will do both in sequence automatically. If working manually, you might first run a noise reduction filter, then sharpen, then reduce noise again. Another tip is to sharpen on the luminance channel only (in LAB color mode or using a luminosity blend) so that color noise isn’t intensified[17]. And remember, a little bit of noise is often preferable to the plasticky smooth look that heavy noise reduction can create. When restoring old photos, retaining some grain can keep it looking like a photo and not an oil painting. In sum: remove distracting noise, but don’t chase absolute perfection in texture – real images have some texture.
- Use Blending Modes to Your Advantage: If you’re using layers in Photoshop, experiment with blending modes for sharpening layers. Common ones for sharpening are Overlay, Soft Light, Hard Light, or Luminosity. For example, a high-pass sharpen layer usually is set to Overlay or Soft Light for a strong or mild effect. Hard Light can be used for even stronger sharpening, but it can easily overdo it. The Luminosity blend mode is great when you’ve done sharpening or deblurring that introduced weird colors or color noise – by setting the sharpened layer to Luminosity, it only affects brightness, not color. This often yields a more natural result. Blending modes can also be used when combining the result of an AI tool with the original: you might put the AI-restored image on top of the original and use a certain opacity or mask to blend the two, picking the best from both (for instance, if AI made the face great but the background weird, you could mask the AI layer to only show the face and let the original background remain).
- Compare Before and After, and Be Conservative: When working on a restoration, it’s useful to frequently toggle your adjustments on and off to compare with the starting image. Ask yourself: “Is the essence of the photo preserved? Did I perhaps lose something important or introduce something odd?” It’s easy to get “edit blindness” after a while, where you lose track of how far you’ve pushed an image. By checking the before/after, you can ensure you haven’t introduced artifacts or over-sharpened. Generally, a slightly softer but natural-looking result is better than a crisply sharpened result that looks harsh or fake. Don’t chase absolute sharpness if the photo doesn’t support it. The goal is improved clarity and legibility, not creating a hyper-real version of an old image.
- Don’t Expect Miracles: This tip is perhaps the most important. There are limits to what any restoration can achieve, and one must set realistic expectations. You cannot recover detail that was never captured[18][19]. If a face in a photo is a completely blurry oval, no tool can tell you the exact eyelashes that were there – it can only guess or draw something “eye-like.” As a restorer, know when to call it “good enough.” Pushing a blurry image too hard can result in strange, plastic-looking outcomes or “ghost” artifacts around edges. Sometimes, it’s okay for a photo to remain a bit soft if that preserves its authenticity. The picture only needs to be clear enough that the content (the person, the scene) is recognizable and the memory can shine through. Chasing perfection can actually ruin a restoration. In the next section, we’ll talk about knowing when to stop. Keep in mind: the aim is to make the photo better, not totally different.
By following these tips – working carefully, leveraging technology wisely, and respecting the photo’s original character – you’ll maximize your chances of achieving a satisfying restoration. Every photo is unique, so these are not hard rules, but rather guiding principles honed by professionals over years of experience.
When to Stop: Understanding Restoration Limits
Not every photo can (or should) be fully “unblurred.” A crucial skill in restoration is knowing the limits – recognizing when you’ve reached the point of diminishing returns or risk harming the image’s integrity. Here are some signs and guidelines for when to stop trying to sharpen a photo further:
- Unrealistic Details Start to Appear: If your restoration process (especially with AI) is generating details that look implausible or incorrect, it’s time to pull back. For example, an AI might decide to give a person vivid, crystal-clear eyes with eyelashes that were never discernible in the original, or it might fill in an indistinct background with invented textures. These aren’t true restorations of the original image but fabrications[20]. If you notice the image has details that you know weren’t there (like different eye color, or extra buttons on a shirt that didn’t exist), you’ve crossed into fantasy. In one user’s experience, an AI app even added teeth to a smiling mouth that was just a blur, but the teeth looked entirely wrong for that person. When an image starts looking like an idealized or altered version rather than the real thing, you should stop and perhaps revert to a slightly less sharp version. The goal is to honor the original moment, not create a new one.
- Visible Artifacts and Halos: Over-processing often introduces visual artifacts. Common ones include halos – bright outlines that show up along high-contrast edges where none should be (a classic symptom of over-sharpening), or ghosting – where a duplicate faint outline of an object appears, usually from algorithms trying to align or deblur a motion path. If you start seeing these artifacts, it usually means the tool has been pushed too far. For instance, if every object in the photo has a light glow or dark edge around it (halo), then the sharpening intensity is too high. Another artifact can be noise patterns or a “patchy” look in areas of uniform color (like sky or walls) – this might happen if AI aggressively sharpened some parts of texture but not others. When artifacts become noticeable at normal viewing size, the image can actually look worse than before. It’s often better to accept a bit of residual blur than to have a photo full of digital artifacts.
- The Image Loses Authenticity: This point is a bit subjective, but incredibly important for things like historical or forensic photos. If a restoration changes the character or context of the image, you may be going too far. Overly aggressive restoration on antique photos, for example, can strip away the “age” and make a 1900s photo look like it was taken yesterday – which some people find jarring because it loses the historic aura. In terms of blur, if an old photo of a soldier has a motion blur because the camera exposure was long, that blur is part of the story of how the image was taken. Removing it entirely might create a false impression. Likewise, in journalism or legal contexts, creating details that aren’t in the original can be ethically problematic. One should always preserve the truth of the image. An ancestor’s face in a single existing photo might be blurry; turning it into a ultra-sharp AI-generated face might misrepresent what they really looked like. As a restorer (professional or hobbyist), have respect for the original – it’s better to have a slightly soft but genuine representation than a sharp but inaccurate one[21].
- Diminishing Returns on Effort: Practically, there’s also the point where you’ve tried multiple techniques and gotten the photo as clear as it reasonably can get, and further tinkering isn’t yielding improvement. You might notice that every new adjustment just makes a different kind of blur or a different artifact. That’s a clue that you’ve hit the limit of the data in the image. Continuing to push might just swap one problem for another. At that stage, it’s wise to stop and save your work at its best point.
Remember, the aim of photo restoration isn’t to make a photo look like it was never blurry at all; it’s to make it look good and convey the subject matter clearly. A useful mantra is: “Restore until the message of the photo comes through, and no further.” If the faces are now recognizable and the scene is clear enough to appreciate, you’ve done your job. Perfection is not only unattainable in many cases – it can be counterproductive.
In the context of blurry photos, a successful restoration might mean the image is noticeably improved and more pleasing to view, even if a little softness remains. It’s okay if a 100-year-old photo doesn’t look like a 24-megapixel digital image after restoration – it’s not supposed to. Embrace the photo’s journey and don’t erase all evidence of its age or the circumstances of its taking. Preservation and legibility are the primary goals, along with maintaining respect for what’s real in the photo.
If you find yourself uncertain, get a second opinion – show the image to someone else. Often, fresh eyes will tell you if it looks natural or overdone. And if you’re ever in doubt or not achieving the result you want, it might be time to consult a professional restoration service that can apply advanced techniques with a careful touch.
Final Thoughts
Unblurring a photo is both a technical challenge and a creative process. From the meticulous darkroom methods of the past to the AI software of today, we now have more tools than ever to bring clarity back to images that once seemed lost. This guide has walked through why blur happens, how different types of blur can be addressed, and the modern arsenal of techniques available to tackle it. We’ve also seen that sometimes the old-school principles – patience, attention to detail, knowing when to stop – are just as important as the newest technology.
To illustrate the impact of these efforts, consider a real-world example: A small, faded photograph from the 1940s shows a young couple dancing, but the movement made it blurry. Using careful digital restoration, a professional was able to reduce the motion blur just enough to reveal the joy in their expressions. The faces went from smeary to discernible. The photo still isn’t tack-sharp (and it shouldn’t be – it was taken in motion), but now the moment “feels alive again.” The smiles are visible, the memory preserved. That is the true success in unblurring a treasured photo – not achieving some sterile perfection, but reviving the essence and emotion of the image.
As you work on your own photos, keep that philosophy in mind. A restored photo doesn’t need to be flawless; it just needs to feel alive again. The tools and tips discussed can greatly improve a blurry image, but ultimately it’s the content of the photo – the people, the place, the memory – that matters most. Your job in restoration is to let those shine through as clearly as possible.
If you have a particularly important or severely blurred photo that you’re hesitant to handle alone, consider reaching out to professional photo restoration experts like us. High-quality photo restoration is often best handled by those with years of experience, specialized tools, and an artist’s eye for detail. Professionals know how to push the limits just enough to get results without crossing the line into over-processed. They can perform advanced feats like reconstructing missing features or blending multiple techniques for the optimal outcome. Most importantly, they approach precious images with the care and respect they deserve. There is no shame in seeking help – even with all the DIY tools available – because at the end of the day, the goal is to save the photo.
In the rapidly evolving world of AI, we can expect that restoring blurry images will become even easier and more effective in the future. But no matter what, the guiding principles will remain: start with a good understanding of the problem, use the right tool for the right blur, and apply a thoughtful, light touch. With that approach, you can rescue many a blurry photograph from the brink and give it back its clarity – and in doing so, give back the story it was meant to tell.
Frequently Asked Questions (FAQ)
- Can I fix a blurry photo myself, or do I need a professional?
It depends on the severity and type of blur. Many modern tools — including AI-based apps and Photoshop — offer decent results for casual use, especially if you’re working with portraits or lightly blurred images. However, for your most important photos (e.g., heirloom images, archival materials, or anything for print), a professional brings both the technical skill and aesthetic judgment to avoid overcorrection or artifact issues. - What’s the difference between sharpening and unblurring?
Sharpening increases contrast at edges to enhance the perception of sharpness, while unblurring involves attempting to restore or reconstruct lost detail. They’re related, but unblurring is a more complex process — especially when blur is caused by motion or missed focus. Most sharpening tools can’t truly “recover” detail, but advanced software and professional workflows aim to rebuild it more convincingly. - Why do AI tools sometimes make people look strange or unnatural?
AI tools work by predicting what should be there — not by recovering actual data. In portraits, this sometimes results in overly smoothed skin, incorrect facial structure, or added features (like perfect teeth or overly bright eyes). These enhancements can look artificial, especially when applied to older or low-resolution photos where the algorithm has little information to work with. - Is it better to work from a scanned print or a photo of a print?
Always scan when possible. Photographing a print introduces additional blur, glare, and distortion — especially from uneven lighting or camera shake. A flatbed scanner preserves more detail and provides a more stable base for restoration. Even a modest consumer-grade scanner typically outperforms a phone camera for this purpose. - Can a photo that’s completely out of focus be fixed?
Only to a point. If there’s no detail to begin with, no tool can truly recreate it. AI may invent plausible features, but they won’t be authentic to the original scene or subject. Professionals often choose to enhance readability (making eyes more defined, for example) without going so far that the person becomes unrecognizable. - What types of blur are the hardest to fix?
Severe motion blur and deep out-of-focus blur are among the hardest. With motion blur, the image may be “smeared” in one direction, requiring complex deblurring algorithms. With out-of-focus blur, the camera never captured detail in the first place. In both cases, the success of restoration depends on the degree of blur, subject matter, and tools available. - Will sharpening increase the resolution of my image?
No. Sharpening enhances edge contrast, but it doesn’t add resolution. Upscaling tools can increase pixel dimensions, and some AI upscalers do a decent job preserving detail — but this is interpolation, not true resolution gain. A professionally restored image may look more detailed, but it’s due to enhancement, not new data. - Are there any risks to using free online deblurring tools?
Yes. Privacy is one concern — you’re uploading personal images to unknown servers. Quality control is another. Many free tools apply overly aggressive sharpening or AI hallucinations without allowing manual refinement. These can work for fun or low-stakes images, but they’re not recommended for irreplaceable photos. - Can blurry video frames be restored the same way as photos?
Some techniques overlap, but video presents additional challenges. Each frame must be deblurred consistently to avoid flicker or ghosting. Professionals working with archival or wedding footage often use specialized software that handles temporal consistency across frames — a much more complex process than single-image restoration. - What’s the biggest mistake people make when trying to unblur a photo?
Overprocessing. It’s tempting to push sliders until an image looks “sharper,” but that can introduce halos, artifacts, or unnatural texture. The best restorations are subtle — they enhance without announcing themselves. If you’re unsure whether you’re improving or damaging the image, that’s a sign it might be time to bring in a professional.
Sources:
- Wikipedia: Unsharp masking (history of analog technique)[2]
- Swiss Camera Museum: 19th-century negative retouching practices[3]
- Rememorie Photo Restoration Examples – noted blur is one of the most difficult issues to fix[22][23]
- Digital Photography Review – Topaz Photo AI review (on its sharpening capabilities)[11][10]
- Adobe – Lightroom’s AI-powered image sharpening (Adobe Sensei auto-correction)[12]
- Shotkit – Remini App overview (instant unblurring with generative AI)[14]
- Shotkit – Remini App caveats (on fidelity to original image)[15]
- Adobe Help Center – Photoshop Shake Reduction filter description[6]
- Digital Photography Review – AI struggles (motion blur example in Topaz review)[8]
[1] [22] [23] 20 Stunning Photo Restoration Examples: Before & After Gallery – Rememorie
https://rememorie.com/photo-restoration-examples-before-and-after/
[2] Unsharp masking – Wikipedia
https://en.wikipedia.org/wiki/Unsharp_masking
[3] [4] Retouching Negatives | Camera Museum
[5] The Art of Retouching – Pre-Photoshop
https://pastonglass.wordpress.com/2017/11/28/the-art-of-retouching-pre-photoshop/
[6] [7] Reduce image blurring in Adobe Photoshop caused by camera shake
https://helpx.adobe.com/photoshop/using/reduce-camera-shake-induced-blurring.html
[8] [9] Topaz Photo AI review: Numerous ML-powered tools all in one app: Digital Photography Review
https://www.dpreview.com/reviews/topaz-photo-ai-review-numerous-ml-powered-tools-all-in-one-app
[10] [11] Topaz Photo AI: Is it Worth the Money? [2025 Review] – CaptureLandscapes
https://www.capturelandscapes.com/topaz-photo-ai/
[12] Using the AI image sharpener in Lightroom – Adobe
https://www.adobe.com/creativecloud/photography/discover/image-sharpener.html
[13] Transform Blurry Photos with AI Technology – Remini
https://remini.ai/unblur-sharpener
[14] [15] How to Use Remini AI Photo Enhancer App
[16] [18] [19] [20] [21] How to Unblur a Photographic Image – V1.docx
file://file-Q4an4A15icDo9NJXiR5BHQ
[17] Thread: Sharpening blending mode?